
Free apron patterns are everywhere, but most fit nobody. Here's how to judge any apron sewing pattern before you cut — and fix the fit in 15 minutes.
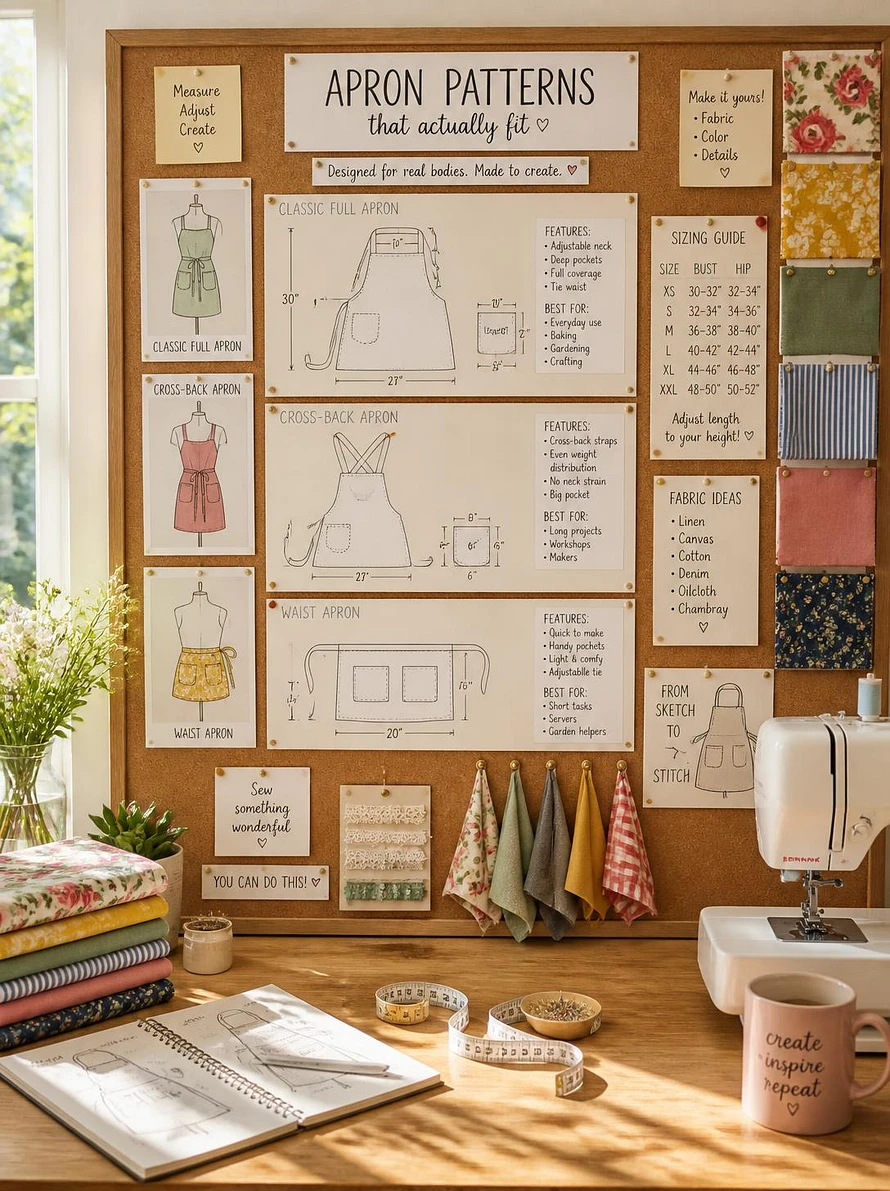
The most expensive apron pattern you'll ever sew is the free one that doesn't fit. I've made roughly two hundred aprons — bridal shower gifts, market-stall samples, kitchen experiments that went sideways — and in almost every failure, the pattern wasn't the problem. The "one
Here's the uncomfortable truth about apron sewing patterns: most of them are graded for a person who doesn't exist. This guide shows you how to read a pattern like someone who's been burned, pick the shape that suits your body, and fix whatever doesn't fit in the time it takes a kettle to boil.
Why "One Size Fits All" Is a Promise Nobody Keeps
Run this scenario through your head. Two sewists download the same free cross-back pattern. One is 5'2", the other is 6'1". The pattern says "one size fits all" — and it technically fits neither.
A
That's the gap the pattern industry quietly depends on: the same piece of cloth sold to everyone, adjusted for no one. Once you accept that "one size fits all" is a marketing phrase rather than a sizing system, every pattern you pick up stops
The Three Measurements That Decide Everything
Forget the bust-waist-hip triple that dominates dress patterns. Aprons hang differently, so only three numbers matter — and you can take them in under two minutes with a tape measure and a belt.
Torso length. Measure from the top of your shoulder, over the chest, down to your natural waist. This single number decides whether a bib apron's neckline chokes you or slouches off. Get it right and the pattern's proportions fall into line.
Cross-back width. Measure across your upper back, roughly at shoulder-blade height. This
Waist-tie height. For half and bistro aprons, mark where your apron skirt should sit: true waist, high hip, or low hip. This changes the skirt length you need and whether the ties flatter you or bunch up.
Patterns rarely ask for these. That's not an oversight — it's a cost-cutting decision, because grading for real bodies means producing more than one pattern piece. So bring the measurements yourself
How to Read Any Apron Pattern Before You Cut It
Half the free patterns on the internet will disappoint you. You can spot which half
The photo test. Look at every image in the listing. If every shot shows one body type, one height, one posture, the designer didn't test on a range of bodies. Patterns photographed on a single model are the same gamble as a pattern with no model at all.
The size test. Open the size chart. Does it list letters — S, M, L — or actual measurements in inches and centimeters? A pattern that only offers S-M-L is a pattern that
The drafting test. Read the fine print for which adjustments the designer acknowledges. A good pattern tells you, honestly, that the neck drop runs short on tall wearers or that the waist sits high. Silence on the subject is not neutral — it's a warning.
No pattern is free if you spend the evening seam-ripping it. Budget two extra hours for every pattern that fails the photo test, and you'll stop being surprised by the ones that do.
Four Apron Shapes, One Right Answer for Your Body
The apron world keeps re-inventing the same four shapes. Stop browsing them by looks and start matching them to your measurements.
Half aprons (waist-down, ties at the back) are the most forgiving shape in sewing. They only have to fit two of your three numbers — waist height and length — which is why they're the right first project for almost anyone. If you're making an apron for a gift, default to this shape.
Bib aprons (full coverage over the chest) are where "one size fits all" fails hardest, because they hang from the neck. Your torso length
Cross-back aprons look effortless and fit almost nobody out of the envelope. The panel width and strap drop both have to land, which means two chances to miss. They're beautiful — make one after you've sewn a half apron and know what a good fit feels like.
Waist aprons (worn like a skirt, no bib) are the outsider: retro, flattering, and they let you skip neckline problems entirely. If your upper body is where patterns always go wrong for you, this is the shape that forgives you.
The single most useful question to ask before choosing a shape: where does this hang from, and does my body cooperate with that anchor point? Neck-anchored shapes punish torso length; waist-anchored shapes forgive almost everything.
How to Fix a Bad Fit in 15 Minutes — Without Redrafting Anything
You don't need to start from scratch when a pattern misses. Three adjustments cover 90 percent of apron fitting problems, and each takes a quarter of an hour.
Too short? Add to the hem — but don't just stitch a wider hem, because that shortens the skirt further. Cut the skirt piece at the hem fold line, insert a strip of fabric (even a contrast band), and press. You gain two to four inches without touching the neckline.
Straps choking you? The fix isn't shortening the strap — it's repositioning where it attaches. Move the strap's front attachment points a half-inch toward the center front on both sides, and the whole neckline shifts forward, away from your throat. A fifteen-minute pin-and-try beats an hour of guessing.
Waist too baggy? Pin two tucks at the side seams, equal on both sides, tapering to nothing at the hem. Start with a half-inch per side, try it on, and repeat. You're re-grading the waist to your number without re-drafting the piece.
I've rescued three "finished" aprons for other people with exactly these moves. The seam ripper is a fitting tool, not a failure flag.
What a Good Pattern Library Should Give You
This is where a curated library like apronsewingpatterns.com earns its keep. A pattern collection organized around real fit — graded sizes, honest size charts, adjustment notes in the descriptions — saves you the three-test screening process every single time you search for "free apron sewing pattern." You're not trading
What you're actually buying, whether the pattern is free or paid, is the answer to one question: did the designer think about bodies other than their own? That answer is visible in the size chart, in the adjustment notes, and in whether the pattern dares to give you numbers instead of letters. Collect patterns the way you collect recipes — by how reliably they work, not how pretty the photo is.
And if you're new: pick one pattern that fits your torso length and cross-back width from the start. The confidence you gain from a well-fitting first apron is worth more than the forty free downloads collecting dust in your saved folder.
The good news buried under all those free downloads is that an apron is one of the simplest garments a human can sew — a rectangle, a bias tape, a pocket, done. The only skill that separates a dish towel from a garment is the fitting, and now you know the three numbers that control it. Find a pattern that respects those three numbers, and the rest of the apron is genuinely just fabric.
FAQ
Do I need a printer for printable apron patterns? Yes, and it matters more than people think. Set print scaling to 100% (never "fit to page"), print the test square first, and check it against a ruler — a pattern printed at 97% scales every single measurement down, and the error compounds across multiple pages.
What fabric should a first apron use? A medium-weight cotton, canvas, or twill at 7–9 oz. Quilting cotton is too thin for anything beyond a symbolic apron, and denim can fight a beginner machine at the seams. Kitchen linen is lovely but pricier than it needs to be for practice.
How long does the whole project take? A half apron with pocket, cut to your measurements, is a 2–3 hour evening for a confident beginner. Bib and cross-back shapes run closer to 4–6 hours because of the strap work and fitting. If it takes you longer, that's normal — your machine isn't as fast as the video editor's.
5 Key Takeaways
- "One size fits all" on an apron pattern means graded for the model, not for you — treat it as a starting point, not a promise.
- Only three measurements matter for apron fit: torso length, cross-back width, and waist-tie height.
- Screen any pattern with the photo test, the size test, and the drafting test before you cut fabric.
- Half aprons are the most forgiving shape; bib and cross-back aprons punish torso-length mismatches.
- Three 15-minute adjustments — extending the hem, repositioning straps, and pinning side tucks — fix 90% of fit problems without redrafting